

In today’s digital age, online advertisements can often disrupt your browsing experience. Thankfully, Windows 11 offers native settings to block ads effectively. By configuring your DNS settings, you can enjoy a faster, distraction-free experience on both Wi-Fi and Ethernet connections. Here’s a step-by-step guide to help you set up ad-blocking on your system.
Why Use DNS Settings to Block Ads?
Domain Name System (DNS) translates human-friendly domain names into IP addresses. By using specialized DNS servers, you can filter out malicious and intrusive ads before they reach your device. This method is not only effective but also doesn’t require additional software installation.
Step-by-Step Guide to Configure DNS in Windows 11
For Wi-Fi Connections:
- Open Settings.
- Navigate to Network & Internet > Wi-Fi > Hardware Properties.
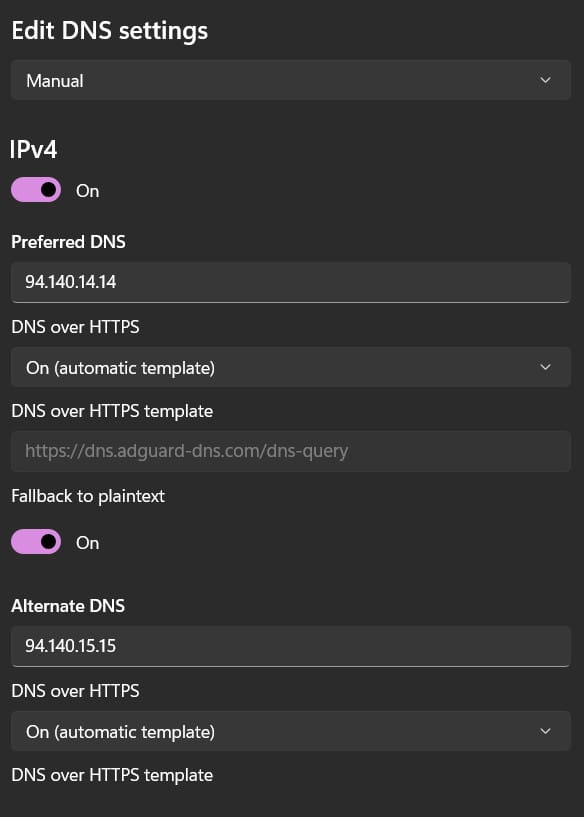
- Under DNS Server Assignment, click Edit and select Manual.
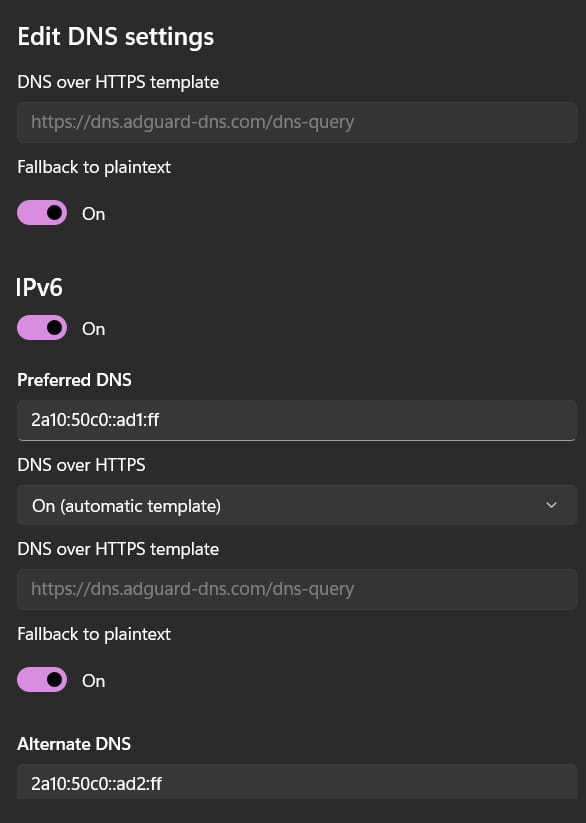
- Enable IPv4 and IPv6 options.
- Input the following DNS addresses:
- Primary DNS (IPv4): 94.140.14.14
- Secondary DNS (IPv4): 94.140.15.15
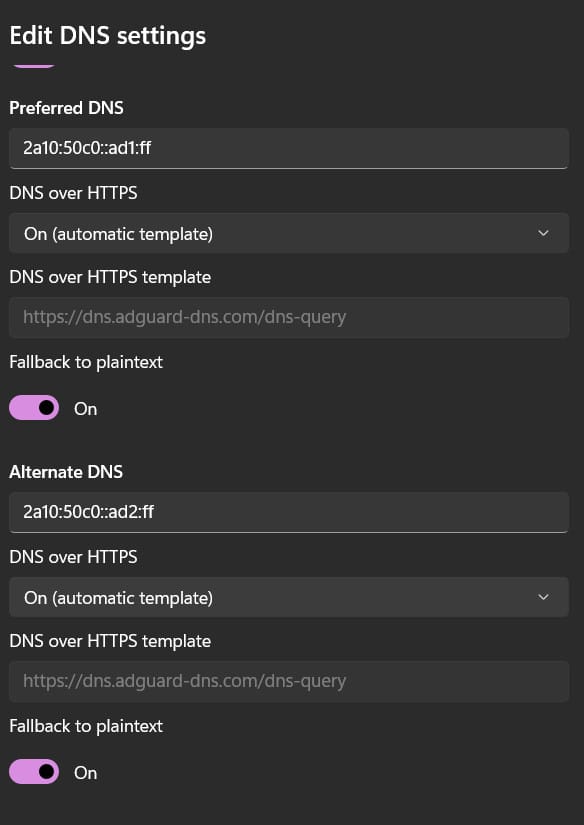
- Primary DNS (IPv6): 2a10:50c0::ad1:ff
- Secondary DNS (IPv6): 2a10:50c0::ad2:ff
- Save the settings and restart your PC for changes to take effect.
For Ethernet Connections:
- Open Settings.
- Navigate to Network & Internet > Ethernet > Edit DNS Server Assignment.
- Follow the same steps as above to configure the DNS addresses.
It should look Like this :
Benefits of Blocking Ads Using DNS
Enhanced Privacy: Reduces tracking and protects your personal data.
Faster Browsing: Removes ad-related scripts that can slow down websites.
System Efficiency: Avoids additional memory usage from third-party ad-blockers.
By following these simple steps, you can enjoy a cleaner, faster browsing experience on your Windows 11 device. Say goodbye to intrusive ads and regain control over your internet usage today!